Crank and cam are essential components that convert and convert motion in machines, respectively. A crank enables converting linear motion into rotation motion or vice versa. A cam is a rotating or sliding component that converts rotary motion into linear or irregular motion.
About our client
Challenges and requirements
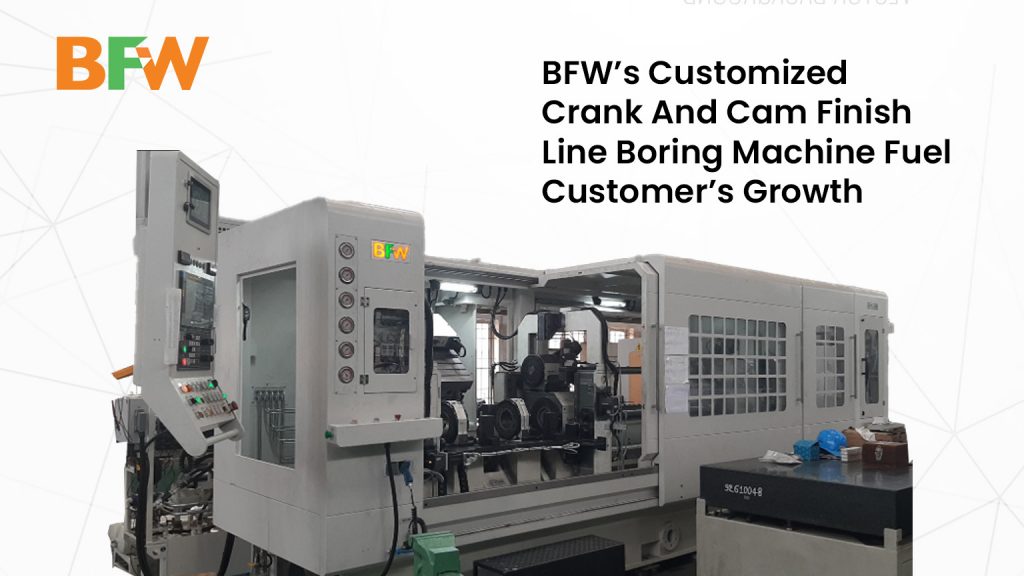
Our client, a leading manufacturer in the automotive sector, approached us with a specific need for a customised crank and cam finish line boring machine to enhance their production process. Their key objectives included:
- Cycle time reduction: Reducing the overall cycle time per component to increase throughput and maximise production capacity.
- Improved production efficiency: Optimising the workflow and machining processes to streamline operations, minimise downtime, and ensure smooth integration into their existing production line.
- Enhanced accuracy: Achieving high precision in crank and camshaft bore machining to meet strict dimensional tolerances is critical for the performance of engine components.
BFW’s solution
We designed and assembled a custom machining solution for the client.
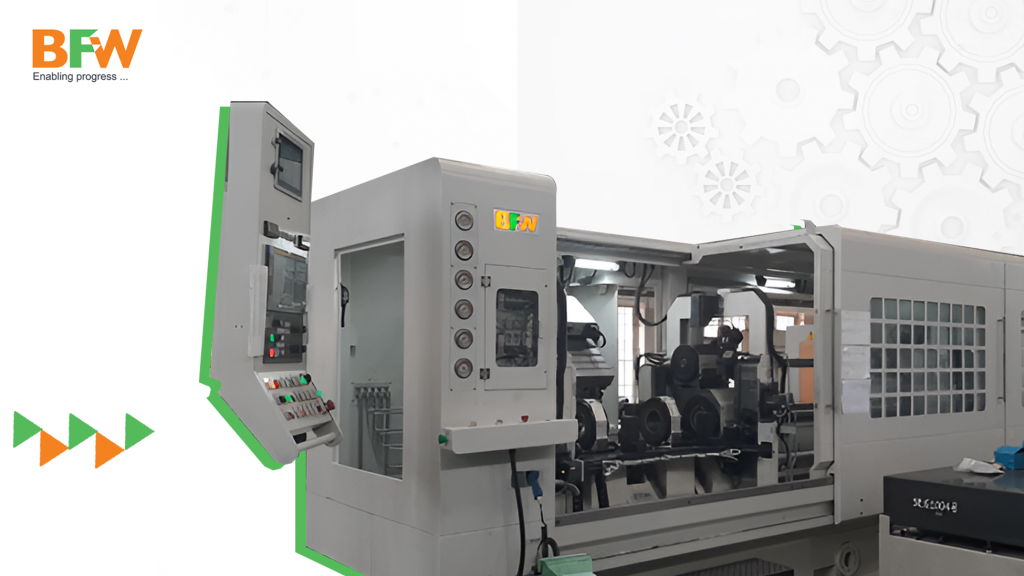
Here are the details:
Input component details
- Component material: Grey cast iron
- Component hardness: 180-230HB
- Component length: 1210mm
Output component details
- Component material: Grey cast iron
- Component hardness: 180-230 hb
Features of spindle
- Number of spindles:-2 No (1 for crank and 1 for cam)
- Type of unit: Horizontal spindle unit
- Spindle motor: 18/22kW AC spindle motor (for crank & cam)
- Drive to spindle: Through belt
- Spindle taper: HSK C100
Impact
One of the key performance indicators for the success of our customised cam and crankshaft bore machining solution was its ability to reduce the total cycle time, including the loading and unloading of components, for both semi-finishing and finishing operations.
Estimated Total Cycle Time per Component
During the initial planning and design phase, each component’s projected total cycle time, from loading to unloading, was estimated based on all stages of the semi-finish and finish machining operations. This estimate factored in process complexities such as precision bore alignment, tool changes, and material handling.
Actual Total Cycle Time per Component
After implementing the customised solution, the actual cycle time achieved was significantly reduced, resulting in an approximate 16% improvement compared to the initial estimate. This improvement was achieved through several design and process enhancements:
- Optimised tooling and machining strategy: The use of advanced cutting tools and optimised machining parameters reduced material removal time, while maintaining the high precision required for cam and crankshaft bore machining.
- Efficient fixture design: The customised fixture allowed for faster and more secure clamping of the components, minimising setup times between cycles.
- Improved workflow integration: The seamless integration of the machine into the client’s existing production workflow helped streamline material handling and component transfer processes, reducing idle time between machining operations.
- Advanced CNC controls: The use of state-of-the-art CNC control systems enabled faster toolpath execution, precision movements, and real-time process monitoring, contributing to reduced cycle times while ensuring accuracy in bore machining.
Conclusion
The reduction in cycle time directly impacted the client’s production efficiency, enabling them to process more components in a given timeframe. Over a complete production shift, this improvement translated into significantly higher throughput and better utilisation of resources, ultimately enhancing the client’s overall manufacturing capacity.
We exceeded the client’s expectations by achieving a shorter-than-expected cycle time while maintaining machining quality and precision. We demonstrated the value of customised, high-performance solutions in improving production efficiency and reducing operational costs.

